What is a WiFi Hotspot?
A WiFi Hotspot is a Wireless hub which offers a network access to various devices over a wireless medium using routers. It requires a particular software which gives the ability to host a Hotspot in our computer. In order to reduce the difficulty, it’s better to establish a WiFi Hotspot using Command Prompt.In the 21st century, the utilization of the internet is increasing day by day. At the same time, sharing of resources on the Internet has been triggered between Wireless Routers or Mobile WiFi Hotspots. If you are away from your home network and do not access to your internet connection, you will probably require some of your friends or colleagues internet to share their network access and connect through a common gateway. And that’s what we call a “WiFi Hotspot“.
Read the below steps clearly and start your own WiFi Hotspot.
Step 1:
- Select Command Prompt(Admin) in your computer.
- Command: Windows key(
 ) + X
) + X

Step 2:
- Check whether your computer is supported for Hosted network or not. Type the following command in Command Prompt.
- Command : netsh wlan show drivers
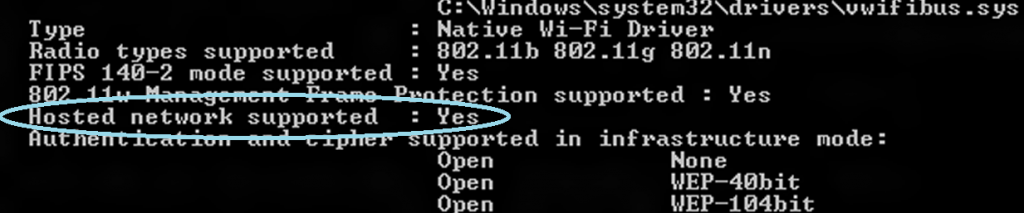
If the result is “YES” then proceed to Step 3 or else download the required drivers from your vendor website.
Configuring the Hosted network connection:
Step 1:
- Type “netsh wlan set hostednetwork mode=allow ssid=yourname key=yourpassword” (enter the command without the quotations).
- Note: In this example, I have used my own user Name and Password. You can use your own parameters for SSID and KEY and Password must be greater than 8 digits.

You have successfully established the Network Connection.
Step 2:
- Start your hosted network.
- Command : netsh wlan start hostednetwork
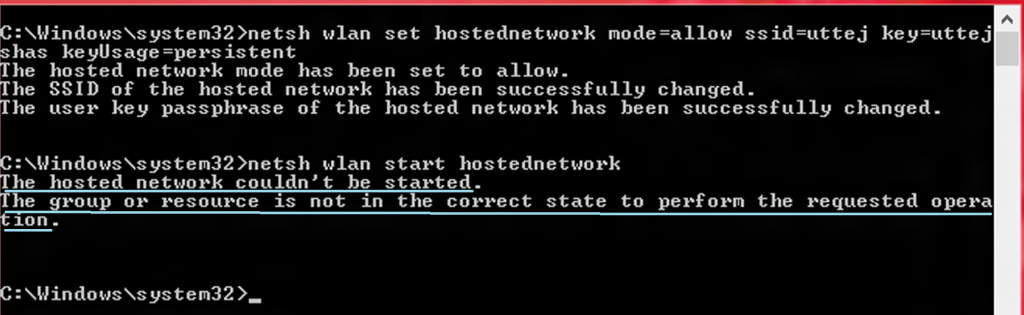
When there is no error:

Sharing your Wireless Network Adapter
Step 1:
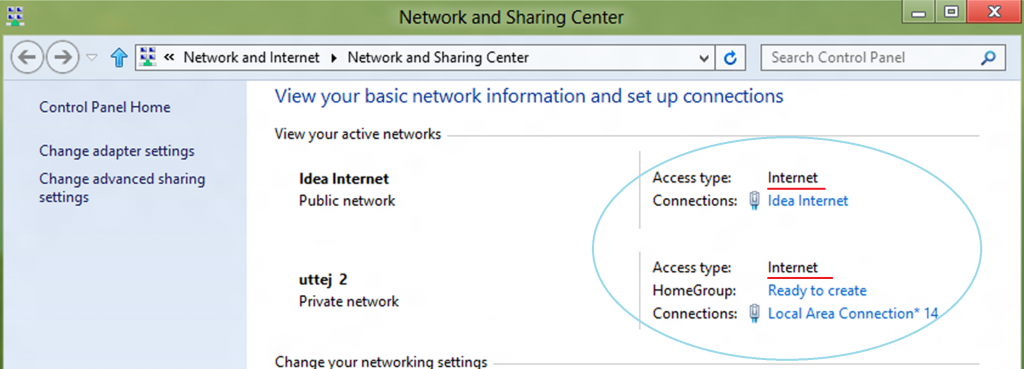
- Go to control Panel -> Network and Internet and select Network and Sharing Center.
Step 2:
- There you can see your newly created network under the original network connection.

Step 3:
- Select “Change adapter settings” in the left side column of Network and Sharing Center.
Step 4:
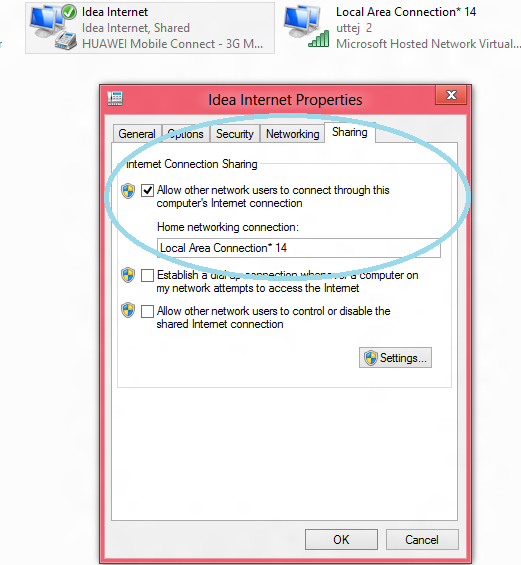
- Right click on your Wireless Network Adapter and select properties. Select the tab “Sharing“. Check the option “Allow other network users to connect through this internet’s connection” option. Mention your newly created hosted network name.
Step 5:
- Check whether your hosted network has shared the network access or not from the Network Sharing and Center.
- Wahoooo!! You have successfully turned on your WiFi Hotspot. Now you can surf internet from any device using the Hotspot.
No comments:
Post a Comment